Category
Blog
📅 23 April 2023
In today’s digital world, it is important to create strong and secure passwords that are difficult to guess or hack. This is where password validation or strength checks come into play. By implementing this password validation feature, website owners can ensure that users create strong passwords that are less likely to be compromised.
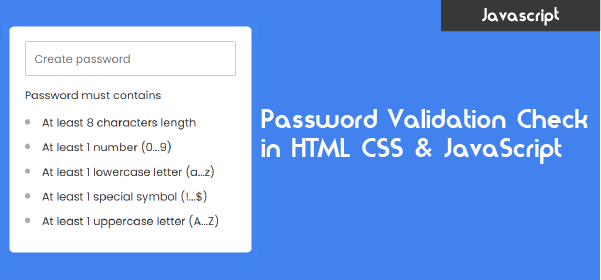
In this blog post, you’ll learn how to do Password Validation Check in HTML, CSS, and JavaScript. Password validation check is a feature that checks if the entered password meets the minimum requirements. This can include a minimum length of 8 characters, at least one uppercase letter, one special character, and more.
In this post, you’ll not only learn how to perform a password validation check, but you’ll also learn how to implement a handy eye icon that toggles password visibility. With this feature, users can easily show or hide their passwords as they enter them.
Steps To Do Password Validation Check in JavaScript
To create a password validation check feature using HTML, CSS, and vanilla JavaScript, follow the given steps line by line:
1. Create a folder. You can name this folder whatever you want, and inside this folder, create the mentioned files.
2. Create an index.html file. The file name must be index and its extension .html
3. Create a style.css file. The file name must be style and its extension .css
4. Create a script.js file. The file name must be script and its extension .js
To start, add the following HTML codes to your index.html file to create a basic layout for the password validation. Keep in mind that if you decide to change the order of the requirements in your password validation checklist, you will need to make some corresponding changes to the JavaScript code as well.
<!DOCTYPE html>
<html lang="en">
<head>
<title> </title>
<link rel="stylesheet" href="style.css">
<meta name="viewport" content="width=device-width, initial-scale=1.0">
<!-- Fontawesome Link for Icons -->
<link rel="stylesheet" href="https://cdnjs.cloudflare.com/ajax/libs/font-awesome/6.3.0/css/all.min.css">
<script src="script.js" defer><script>
</head>
<body>
<div class="wrapper">
<div class="pass-field">
<input type="password" placeholder="Create password">
<i class="fa-solid fa-eye"></i>
</div>
<div class="content">
<p>Password must contains</p>
<ul class="requirement-list">
<li>
<i class="fa-solid fa-circle"></i>
<span>At least 8 characters length</span>
</li>
<li>
<i class="fa-solid fa-circle"></i>
<span>At least 1 number (0...9)</span>
</li>
<li>
<i class="fa-solid fa-circle"></i>
<span>At least 1 lowercase letter (a...z)</span>
</li>
<li>
<i class="fa-solid fa-circle"></i>
<span>At least 1 special symbol (!...$)</span>
</li>
<li>
<i class="fa-solid fa-circle"></i>
<span>At least 1 uppercase letter (A...Z)</span>
</li>
</ul>
</div>
</div>
</body>
</html>
Next, add the following CSS codes to your style.css file to give a basic look and feel to the password validation checklist and password input. If you wish, you can customize it to your liking by changing the color, font, size, and other CSS properties in the file.
    /* Import Google font - Poppins */
    @import url('https://fonts.googleapis.com/css2?family=Poppins:wght@400;500;600&display=swap');
    * {
      margin: 0;
      padding: 0;
      box-sizing: border-box;
      font-family: "Poppins", sans-serif;
    }
    body {
      display: flex;
      align-items: center;
      justify-content: center;
      min-height: 100vh;
      background: #4285F4;
    }
    .wrapper {
      width: 450px;
      overflow: hidden;
      padding: 28px;
      border-radius: 8px;
      background: #fff;
      box-shadow: 0 10px 25px rgba(0,0,0,0.06);
    }
    .wrapper .pass-field {
      height: 65px;
      width: 100%;
      position: relative;
    }
    .pass-field input {
      width: 100%;
      height: 100%;
      outline: none;
      padding: 0 17px;
      font-size: 1.3rem;
      border-radius: 5px;
      border: 1px solid #999;
    }
    .pass-field input:focus {
      padding: 0 16px;
      border: 2px solid #4285F4;
    }
    .pass-field i {
      right: 18px;
      top: 50%;
      font-size: 1.2rem;
      color: #999;
      cursor: pointer;
      position: absolute;
      transform: translateY(-50%);
    }
    .wrapper .content {
      margin: 20px 0 10px;
    }
    .content p {
      color: #333;
      font-size: 1.3rem;
    }
    .content .requirement-list {
      margin-top: 20px;
    }
    .requirement-list li {
      font-size: 1.3rem;
      list-style: none;
      display: flex;
      align-items: center;
      margin-bottom: 15px;
    }
    .requirement-list li i {
      width: 20px;
      color: #aaa;
      font-size: 0.6rem;
    }
    .requirement-list li.valid i {
      font-size: 1.2rem;
      color: #4285F4;
    }
    .requirement-list li span {
      margin-left: 12px;
      color: #333;
    }
    .requirement-list li.valid span {
      color: #999;
    }

    @media screen and (max-width: 500px) {
      body, .wrapper {
        padding: 15px;
      }
      .wrapper .pass-field {
        height: 55px;
      }
      .pass-field input, .content p  {
        font-size: 1.15rem;
      }
      .pass-field i, .requirement-list li {
        font-size: 1.1rem;
      }
      .requirement-list li span {
        margin-left: 7px;
      }
    }
Finally, add the following JavaScript code to your script.js file to add functionality for toggling password visibility and checking the user-entered password against the requirements you have specified in your password validation checklist.
const passwordInput = document.querySelector(".pass-field input");
const eyeIcon = document.querySelector(".pass-field i");
const requirementList = document.querySelectorAll(".requirement-list li");

// An array of password requirements with corresponding
// regular expressions and index of the requirement list item
const requirements = [
    { regex: /.{8,}/, index: 0 }, // Minimum of 8 characters
    { regex: /[0-9]/, index: 1 }, // At least one number
    { regex: /[a-z]/, index: 2 }, // At least one lowercase letter
    { regex: /[^A-Za-z0-9]/, index: 3 }, // At least one special character
    { regex: /[A-Z]/, index: 4 }, // At least one uppercase letter
]

passwordInput.addEventListener("keyup", (e) => {
    requirements.forEach(item => {
        // Check if the password matches the requirement regex
        const isValid = item.regex.test(e.target.value);
        const requirementItem = requirementList[item.index];

        // Updating class and icon of requirement item if requirement matched or not
        if (isValid) {
            requirementItem.classList.add("valid");
            requirementItem.firstElementChild.className = "fa-solid fa-check";
        } else {
            requirementItem.classList.remove("valid");
            requirementItem.firstElementChild.className = "fa-solid fa-circle";
        }
    });
});

eyeIcon.addEventListener("click", () => {
    // Toggle the password input type between "password" and "text"
    passwordInput.type = passwordInput.type === "password" ? "text" : "password";

    // Update the eye icon class based on the password input type
    eyeIcon.className = `fa-solid fa-eye${passwordInput.type === "password" ? "" : "-slash"}`;
});
I have added comments to each line of code in the JavaScript snippet to make it easy to understand and follow along. If you have any questions or need further clarification, please feel free to leave a comment below and I will do my best to help you out.
Conclusion and Final Words
In this blog post, I have covered how to implement a password validation check using HTML, CSS, and JavaScript. This includes creating a password checklist, adding the necessary HTML elements to the form, styling the elements using CSS, and adding JavaScript code to validate the password and toggle password visibility.
If you encounter any problems or your code is not working as expected, you can download the source code files for this password validation for free. Click on the download button to get the zip file containing the project folder with source code files.